Diamond Painting Guides
A Creovia beginner guide
How to Use the Checkerboard Method in Diamond Painting
A practical guide to placing alternating drills, checking alignment, and filling each open space without losing your place.
The checkerboard pattern is one option for planning placements, but it does not suit every painter or every section. It can make spacing easier to inspect when you keep track of the symbols and return to the gaps in order.
What the checkerboard method means
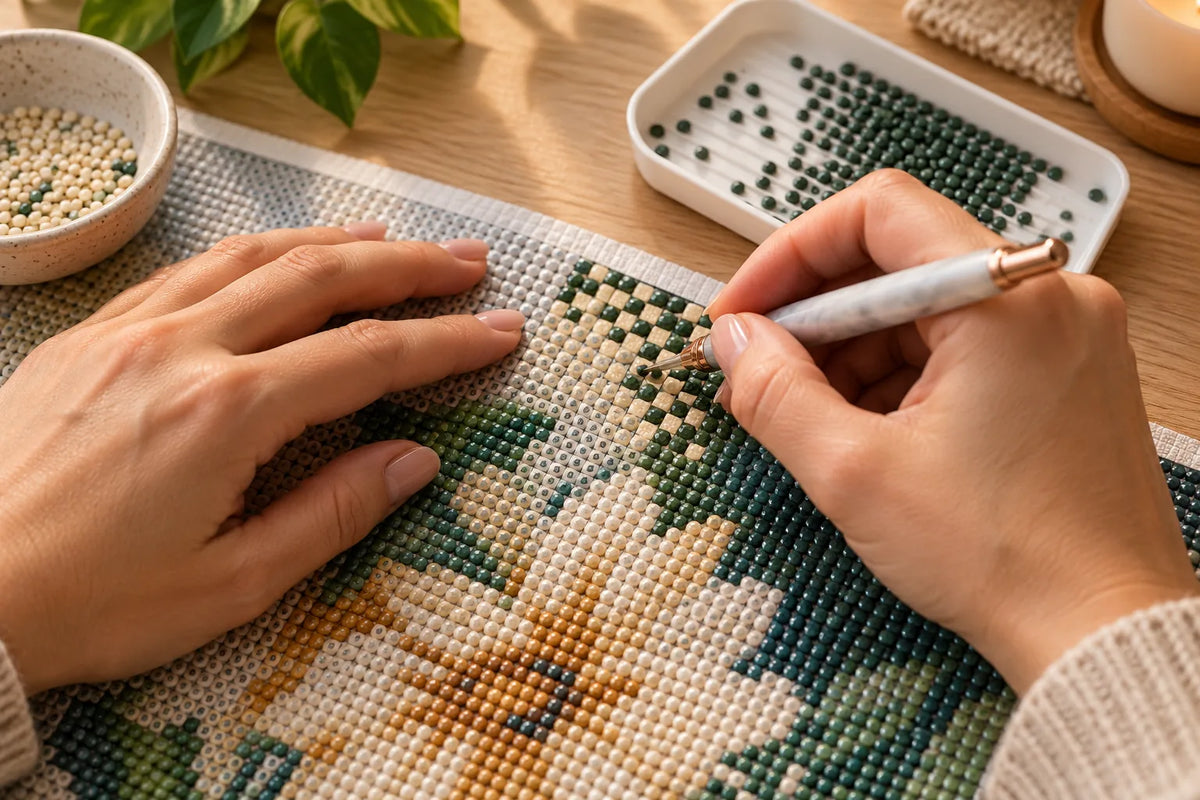
The checkerboard method is a placement pattern: set drills in alternating spaces, then return to fill the gaps. Instead of completing a solid block in one pass, place one drill, leave the next marked space open, and continue to the next matching position. The unfinished patch looks like a checkerboard. A second pass completes the spaces that remain.
This is a workflow choice, not a separate kit or drill type. It can make spacing easier to inspect, especially with square drills that sit close together. Some crafters use it with round drills when an area feels crowded. The symbol chart still determines every color and position; the pattern only changes the order in which you place drills.
Choose a small test area
Start where the symbols are readable and the canvas lies flat. Expose only a small section by folding the protective cover back. A large uncovered area can collect lint or lose tack before you reach it. Keep the rest protected and place only the matching color in a labeled tray.
Plan a route before beginning. A row-by-row pattern is easy to follow, while a small square can be easier in a detailed area. Pick one repeatable direction so you do not lose your place. If you are selecting a first project, compare designs and listed sizes in the diamond painting collection and choose a canvas that suits your work surface.

Make the first alternating pass
Pour a modest amount of drills into the tray and orient them gently. Match the first symbol, place its drill, skip the next marked spot, and continue to the following matching position. Check the key whenever the color changes. The checkerboard pattern helps you see spacing; it does not replace the printed symbol chart.
Pause after a short run and compare the placements with the canvas. Each drill should cover its own symbol, and each gap should remain open for the second pass. Do not press neighbors together to make the row look tighter. If the pattern feels crowded, stop and adjust your pen angle or shorten the run before continuing.
Fill the gaps in a second pass
When the first pass is complete, return to the open positions in the same direction. Check the symbol and color before placing each drill. This pass gives you another chance to notice a misplaced piece, but avoid repeatedly nudging a drill after it settles; that can disturb the pieces around it or spread adhesive residue.
If a drill is clearly in the wrong place, lift it carefully with a clean tool and set it aside. Correct the canvas before continuing. A slower, single-piece correction usually preserves the surrounding work better than pushing a whole block sideways. The goal is accurate placement, not completing the patch in the fewest motions.
Keep rows and spacing under control
Work close enough to see both the symbol and the drill edge. For square drills, inspect a row from more than one angle; one piece can look straight from overhead while sitting slightly rotated. A straight placement pen may help with a uniform row, but it is optional. Confirm that any accessory tip fits your applicator and follow its instructions.
Let the printed grid guide alignment. Lines may not be perfectly uniform, so use symbol centers and neighboring edges rather than assuming the paper marks are exact. Avoid pushing a full row with the side of the pen. Small adjustments made one drill at a time are easier to control and less likely to disturb completed work.
When the method helps—and when it slows you down
Alternating placements can help on square-drill areas where you want to inspect the grid between drills. It can also make a dense patch easier to read because the empty spaces reveal the next symbols. The method is optional: some people prefer a color block or use a multiplacer on broad, even rows.
In a scattered-color section, checkerboarding may add extra color changes. A short run of one symbol can be clearer there. Similar-looking symbols may also be harder to track, so keep the key close and work in a small area. Use whichever order makes it easiest to place the correct drill, rather than choosing a method because it sounds advanced.

Avoid common checkerboard mistakes
The first common problem is losing the pattern and filling a space twice. Stop at the end of each short row and scan for open positions before moving on. Another is exposing too much adhesive while planning a large area. Fold the cover back in small sections and replace it when you pause, following the kit’s care instructions.
Do not switch colors mid-pattern without marking your stopping point. Return one color to its labeled container before opening another. If the row starts to drift, do not force the next drills against it. Remove the misaligned pieces, check the grid, and restart that short run. A careful correction is safer than shifting an entire block.
Finish with a deliberate check
After filling the gaps, compare the section with the chart. Look for uncovered symbols, misplaced colors, or drills that sit noticeably tilted. Check from the side as well as above; a low angle can reveal a gap that was difficult to notice directly overhead. Correct small errors before covering the section or changing colors.
Move the protective film back over the completed area and keep unused drills sorted. If the pattern helped you stay accurate, repeat it on another patch. If it felt slow, use a different approach next time. The finished image depends on following the chart and placing each drill carefully; no single placement pattern is required for every canvas.
Find your next project
Explore diamond painting kits.

Colorful Village Street Diamond Painting Kit
$23.99

Santa Hug Reindeer Diamond Painting Kit Christmas
$23.99

Tropical Hibiscus Queen Diamond Painting Kit
$23.99

Tropical Macaw Hibiscus Diamond Painting Kit
$23.99

Pink Dragon Cherry Blossom Pagoda Diamond Painting Kit
$23.99

Blue Hydrangea Village Diamond Painting Kit
$23.99

Ragdoll Cat Rose Window Diamond Painting Kit
$23.99