Diamond Painting Guides
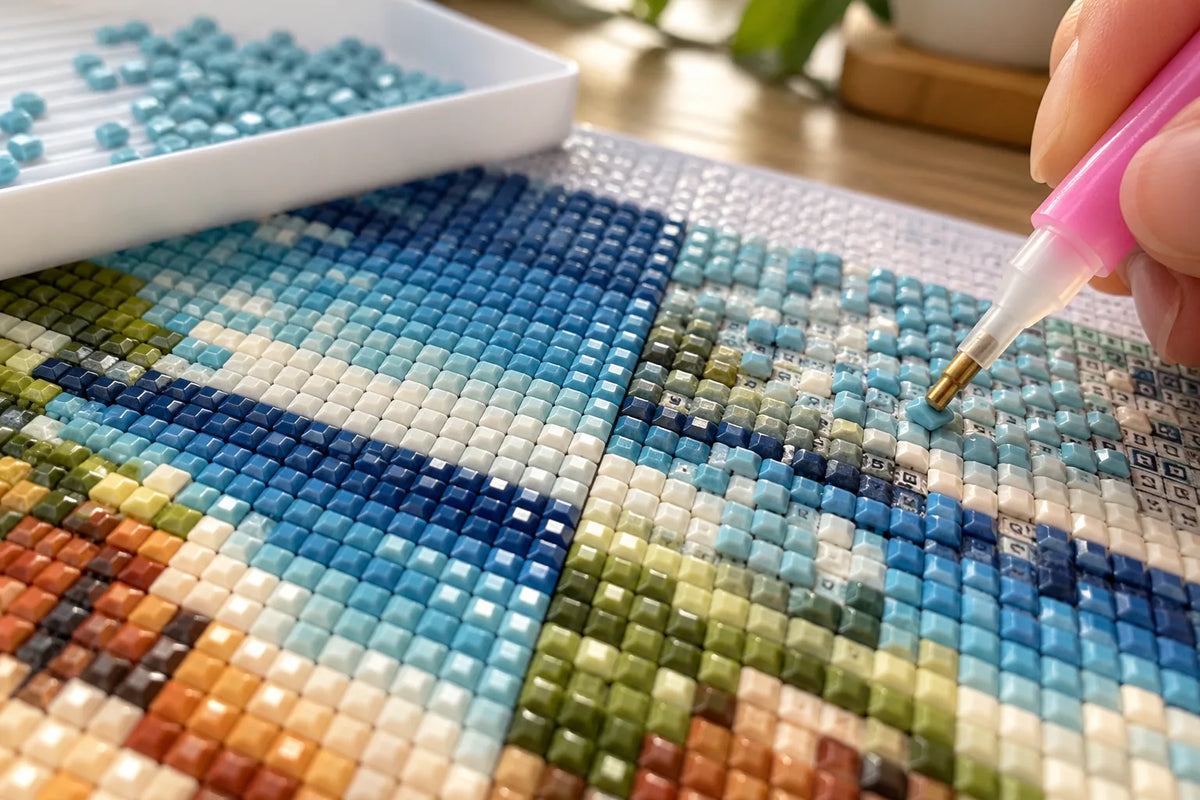
A Creovia beginner guide
How to Place Diamond Painting Drills in Straight Rows
Follow the printed grid and check short runs to keep diamond painting rows neat without forcing drills together.
Uneven rows in diamond painting usually come from small placement differences that build across a section. The canvas grid, the way drills sit in the tray, and the pressure of the applicator all affect alignment. A slower first row gives the rows beside it a dependable reference, especially when placing square drills.
This guide explains how to place diamond painting drills in straight rows, how to check spacing, and how to correct a line before it drifts. It is an alignment method, not a promise that every canvas or drill batch will look identical.
Start with a small, stable section
Put the canvas on a flat surface or a firm board that supports the area you are working on. If the canvas slides as you place a drill, it is harder to keep the pen steady. Uncover only a manageable section according to the kit instructions, and keep the remaining adhesive protected. A large exposed area can collect dust and makes it harder to focus on one line at a time.
Check the printed grid and the symbol key before loading drills. Each square on the chart indicates a color and a placement. Do not assume that an apparent line in the artwork matches the canvas grid: follow the symbols and printed boundaries. Sort a modest amount of one color into the tray, then shake or tilt it gently so the drills settle in a position that is easy to pick up.
Place the first row as your guide
Use the printed grid as a visual reference
Choose a short run in a clear area of the chart. Hold the diamond painting pen close enough to control the tip without pressing hard. Place each drill near the center of its symbol space and compare its edges with the printed grid. With square drills, the sides can make alignment easy to inspect. With round drills, visible gaps are part of the shape, so aim for consistent spacing rather than forcing the pieces together.

Before you continue, pause and look across the row. Are the tops roughly level? Does the line follow the printed boundary? If the first two placements are angled, correct them while the section is small. A slight adjustment early can prevent a visibly slanted run later.
Work in short runs
Place a few drills, then compare the next spaces with the line already established. Long uninterrupted runs can hide a gradual drift until the far end of the section. Short groups make it easier to notice when a drill has moved off center. If your hand is blocking the symbol, shift your wrist or turn the canvas rather than guessing the next placement.
Keep your grip relaxed. Pressing harder does not make a row straighter and can make it difficult to lift a misplaced drill. The applicator should guide the drill onto the adhesive. Follow any tool instructions supplied with your kit, because pen tips and pickup materials differ.
Build neighboring rows without squeezing drills
Once the first row is straight, use it as a reference for the next one. Work across the chart in the direction that feels easiest to see; there is no universal left-to-right rule. Align the edges or centers with the printed grid rather than pushing a new row tightly against the previous row. Square drills may fit closely, but if you force them together, the canvas can look crowded or uneven. Round drills naturally show more of the adhesive or canvas between pieces.
A checkerboard method can help some crafters inspect spacing by leaving alternating spaces and filling them on a second pass. That is different from placing a complete row at a time. If you want to compare the approaches, see our checkerboard method guide. Choose one method for the section and check how it looks before applying it across the whole canvas.
When the symbol chart changes color frequently, finish only a short run before switching colo\nrs. Keep containers labeled and return drills to their proper color after use. A tray with mixed colors can lead to incorrect placements that look like alignment problems. The color key—not a neighboring drill—is the authority for which drill belongs in each space.

Check a row and correct drift
Look at the row from directly above rather than from a sharp side angle. The edge of the canvas and the grid are easier to compare when your view is square to the work. If the line leans, locate the first placement that is noticeably off center. Correcting that point may allow the later drills to sit naturally without shifting the entire row.
Use a clean, suitable tool to lift a misplaced drill gently. Avoid scraping across the adhesive or pulling up the canvas surface. Recheck the symbol and place the drill again. If an entire stretch seems crowded, do not press it harder. Inspect the first few positions and adjust individual drills carefully, following the canvas and tool instructions.
Some charts have a printed grid that is slightly visible between drills; others may have small variations in print or drill shape. A neat result means consistent placement for that section, not a perfectly machine-cut line under every lighting condition. If the work looks aligned from your normal viewing distance, a tiny difference may not need further adjustment.
Common causes of crooked diamond painting rows
- Starting without leveling the canvas: a tilted surface makes a straight run look diagonal.
- Working too far ahead: long runs make small shifts difficult to catch.
- Using the wrong color: always return to the key when symbols are similar.
- Overfilling the tray: crowded drills are harder to pick up consistently.
- Pressing neighboring drills together: this can distort spacing instead of improving it.
The round vs. square drill guide explains how drill shape affects the look and feel of a canvas. For a design to practice with, browse the diamond painting collection or review current details for the Pink Blossom Owl Diamond Painting Kit.
Make alignment part of the routine
Before moving to a new section, make one quick check: the color matches the symbol, the drills sit within their chart spaces, and the row still follows the grid. That brief pause is easier than trying to repair a large patch later. If the canvas or printed chart behaves differently than expected, consult the product instructions and compare the full image with the close-up before continuing.
There is no need to make every placement at the same speed. A steady rhythm comes from repeating a small sequence: read the symbol, choose the correct color, set the drill in the center, and inspect a short run. If you are new to the process, start with the beginner step-by-step guide and use its workspace tips alongside this row method.
Find your next project
Explore diamond painting kits.

Colorful Village Street Diamond Painting Kit
$23.99

Santa Hug Reindeer Diamond Painting Kit Christmas
$23.99

Tropical Hibiscus Queen Diamond Painting Kit
$23.99

Tropical Macaw Hibiscus Diamond Painting Kit
$23.99
Pink Dragon Cherry Blossom Pagoda Diamond Painting Kit
$23.99

Blue Hydrangea Village Diamond Painting Kit
$23.99

Ragdoll Cat Rose Window Diamond Painting Kit
$23.99